![]()
Tsukayu Hard Bag installation Tips
We have put together a few tips and suggestions on mounting Tsukayu Hard Bags. These are in addition to the Tsukayu Instructions that come with the bags. These are just some helpful tips that we have learned from mounting these bags ourselves.
|
Exhaust and Component Clearances
When mounting the hard bags, make sure to maintain
at least one inch of clearance between
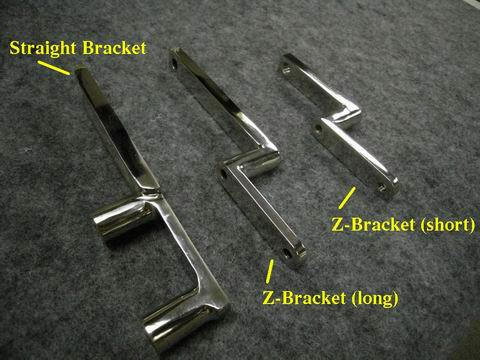
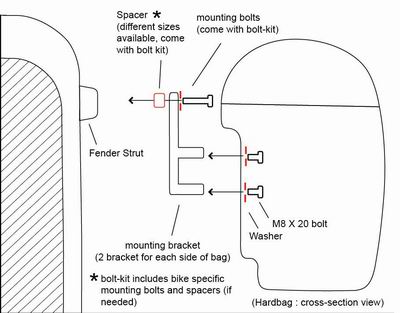
Bracket Angle:
There is a slight indentation on most motorcycle side rails where
the rail bolts are installed. Your mounting kit will have spacers that will be installed between the side rail and your
Tsukayu Bag
Bracket. The spacers are anywhere from 5mm to 30mm long depending on
the bike. During installation, loosen both side rail bolts, but only
take one out at a time.
You can see that the bike to the upper right has the supplied
Hex Head Bolts installed on the Side Rails. We have installed Button
Head Bolts on our
bikes Side Rails. |
|
|
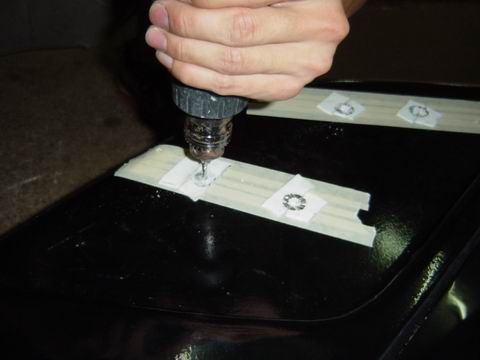
Marking the Bags:
We have found that it is much easier to have one person hold the bags
while you mark. You need to have this exact. When drilling always drill a small pilot hole first. When removing tape, be very careful. Pull tape slowly towards the hole during removal. |
 |
|
Marking the second bag:
The instructions will have you remove the first bag
after drilling after making sure that it fits correctly. You will
then tape the second set of brackets onto the brackets that you have
bolted onto your previously drilled bag. We have found that placing the bags on a table or something that can be moved then pushing them against a wall or door will help in getting the bags parallel with each other. You need to have this exact. |
 |
|
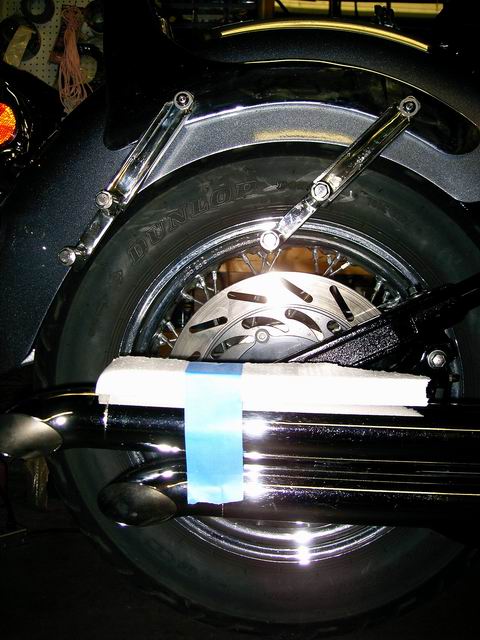
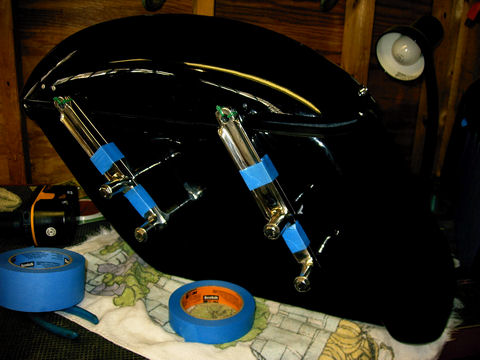
Bolts and Spacers & Misc.: We used Button Head Allen Head Bolts
instead of the supplied Hex Head Bolts for bag installation as shown to
the right. The supplied bolts are M8 x 25mm. This is just
personal preference and I like the look better. If you do decide to
use rounded Button Head Bolts instead, you will need a 5mm Hex Bit Socket
Drive. After you have ridden a few miles check all mounting bolts for tightness. Also check the two small screws on the bottom of each lock. The lock screws are on the bottom of the lock cylinder holding the small plate. If they are loose then take one apart at a time and apply some loctite on the threads. LED Turn Signals: FAQ:
Can I use any brackets to mount the Tsukayu Bags?
|
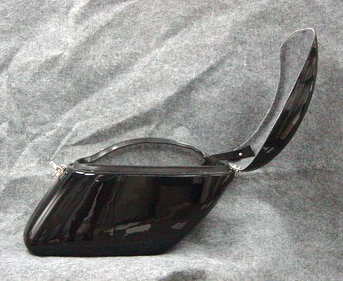
 Quick
Release Bags with flat back shown below. You can see the back
comes up higher compared to the regular
Strong Bags, allowing you to install the brackets as high as possible on
the HardBags.
|
Tsukayu Strong Bags Shown
Below installed on our own Kawasaki VN 2000

![]()
|
|
|||
|
Give us a Phone Call for
questions or to place a phone order.
440-259-4793
|
|
||
|
|
|||
Copyright © 2002 - 2012 Value-Accessories